Upload objects
In Lattice, an object is a data model that represents a single file or a piece of data. This page explains how to upload an object to Lattice and associate it with an entity using the Lattice SDK.
In the following steps, you use an image, and a CSV file. Lattice, however, supports all binary data, letting you use objects to implement a variety of use-cases. For example, consider a scenario where an image sensor integrated with Lattice detects a track image and uploads an image of it to Lattice. After the file is uploaded, any device, app, or operator in Lattice can access the image associated with the track.
To implement this use-case, you use the following API operations:
-
UploadObject— Uploads an object using multiform data. -
PutEntityOverride— Override the entity and update the entity’smediacomponent.Entity overrides let any integration update certain components in an entity, even if the entity was initially published by another data source. This means that anyone connected to Lattice can update the media associated with the entity, giving you more flexibility.
Before you begin
- To configure your app to upload objects, set up your Lattice environment.
- See an overview of the Object schema and the Object Store API in Lattice.
gRPC authentication
If you are using gRPC with client credentials, set up the token refresh module before running the examples on this page.
Upload an object
In Lattice, an object is a data model that represents a single file or a piece of data. To upload an object to Lattice, do the following:
Upload the image to Lattice
Run the following code from the same folder where you saved the image.
To upload, use UploadObject and replace the following:
file_path: the path to the file you want to upload to Lattice.
An object path must only contain the following characters: A-Z,
a-z, 0-9, .
_, -.
Verify the response
If successful, you’ll see the following output.
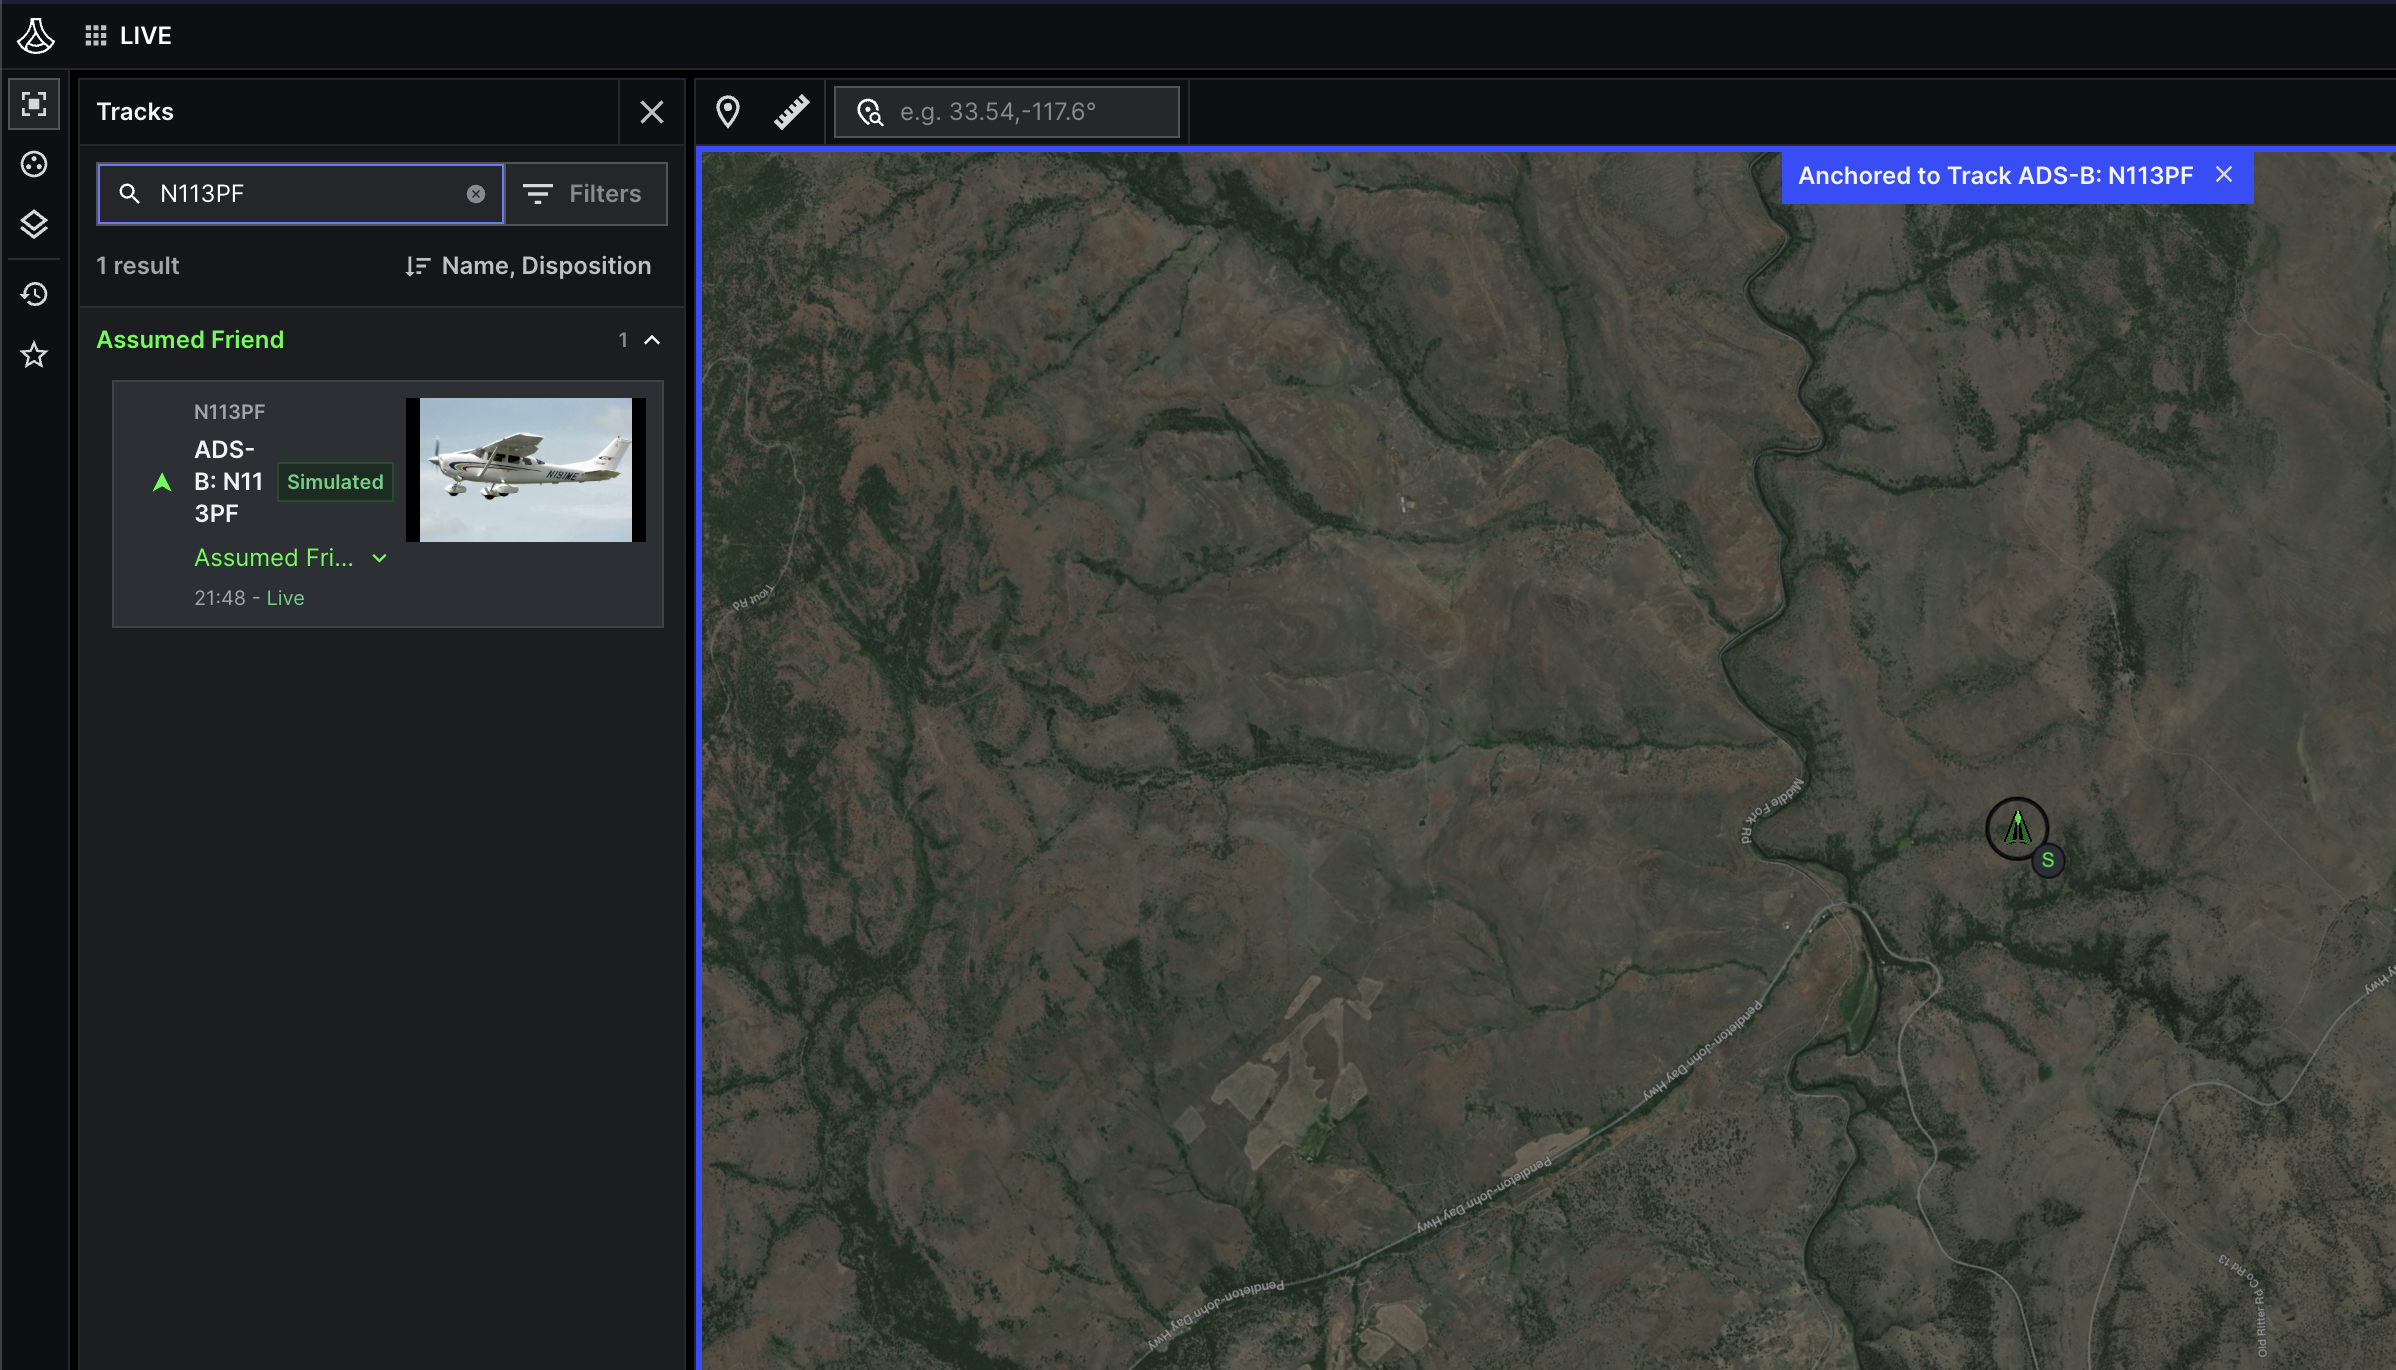
Note the object path: /api/v1/objects/cessna.jpg.
In the following section, you’ll override an entity to associate it with this object using its unique object path.
This lets Lattice know to display the image in the entity panel as a thumbnail.

Link an object
To associate an image with an entity, do the following:
Override the entity
Use the
OverrideEntity operation to override the entity’s
media component and replace MediaItem.
To implement a thumbnail, set MediaItem.type to MEDIA_TYPE_IMAGE.
This lets Lattice know to process the binary object as an image.
Replace the temporary values with your information, then run the code:
object_path: The unique path of the object in Lattice. For this example, use/api/v1/objects/test-1.test.jpg.entity_id: The ID of the entity you want to associate with the object. If you are developing in Sandboxes, enteradsbEntityto use an existing simulated entity.
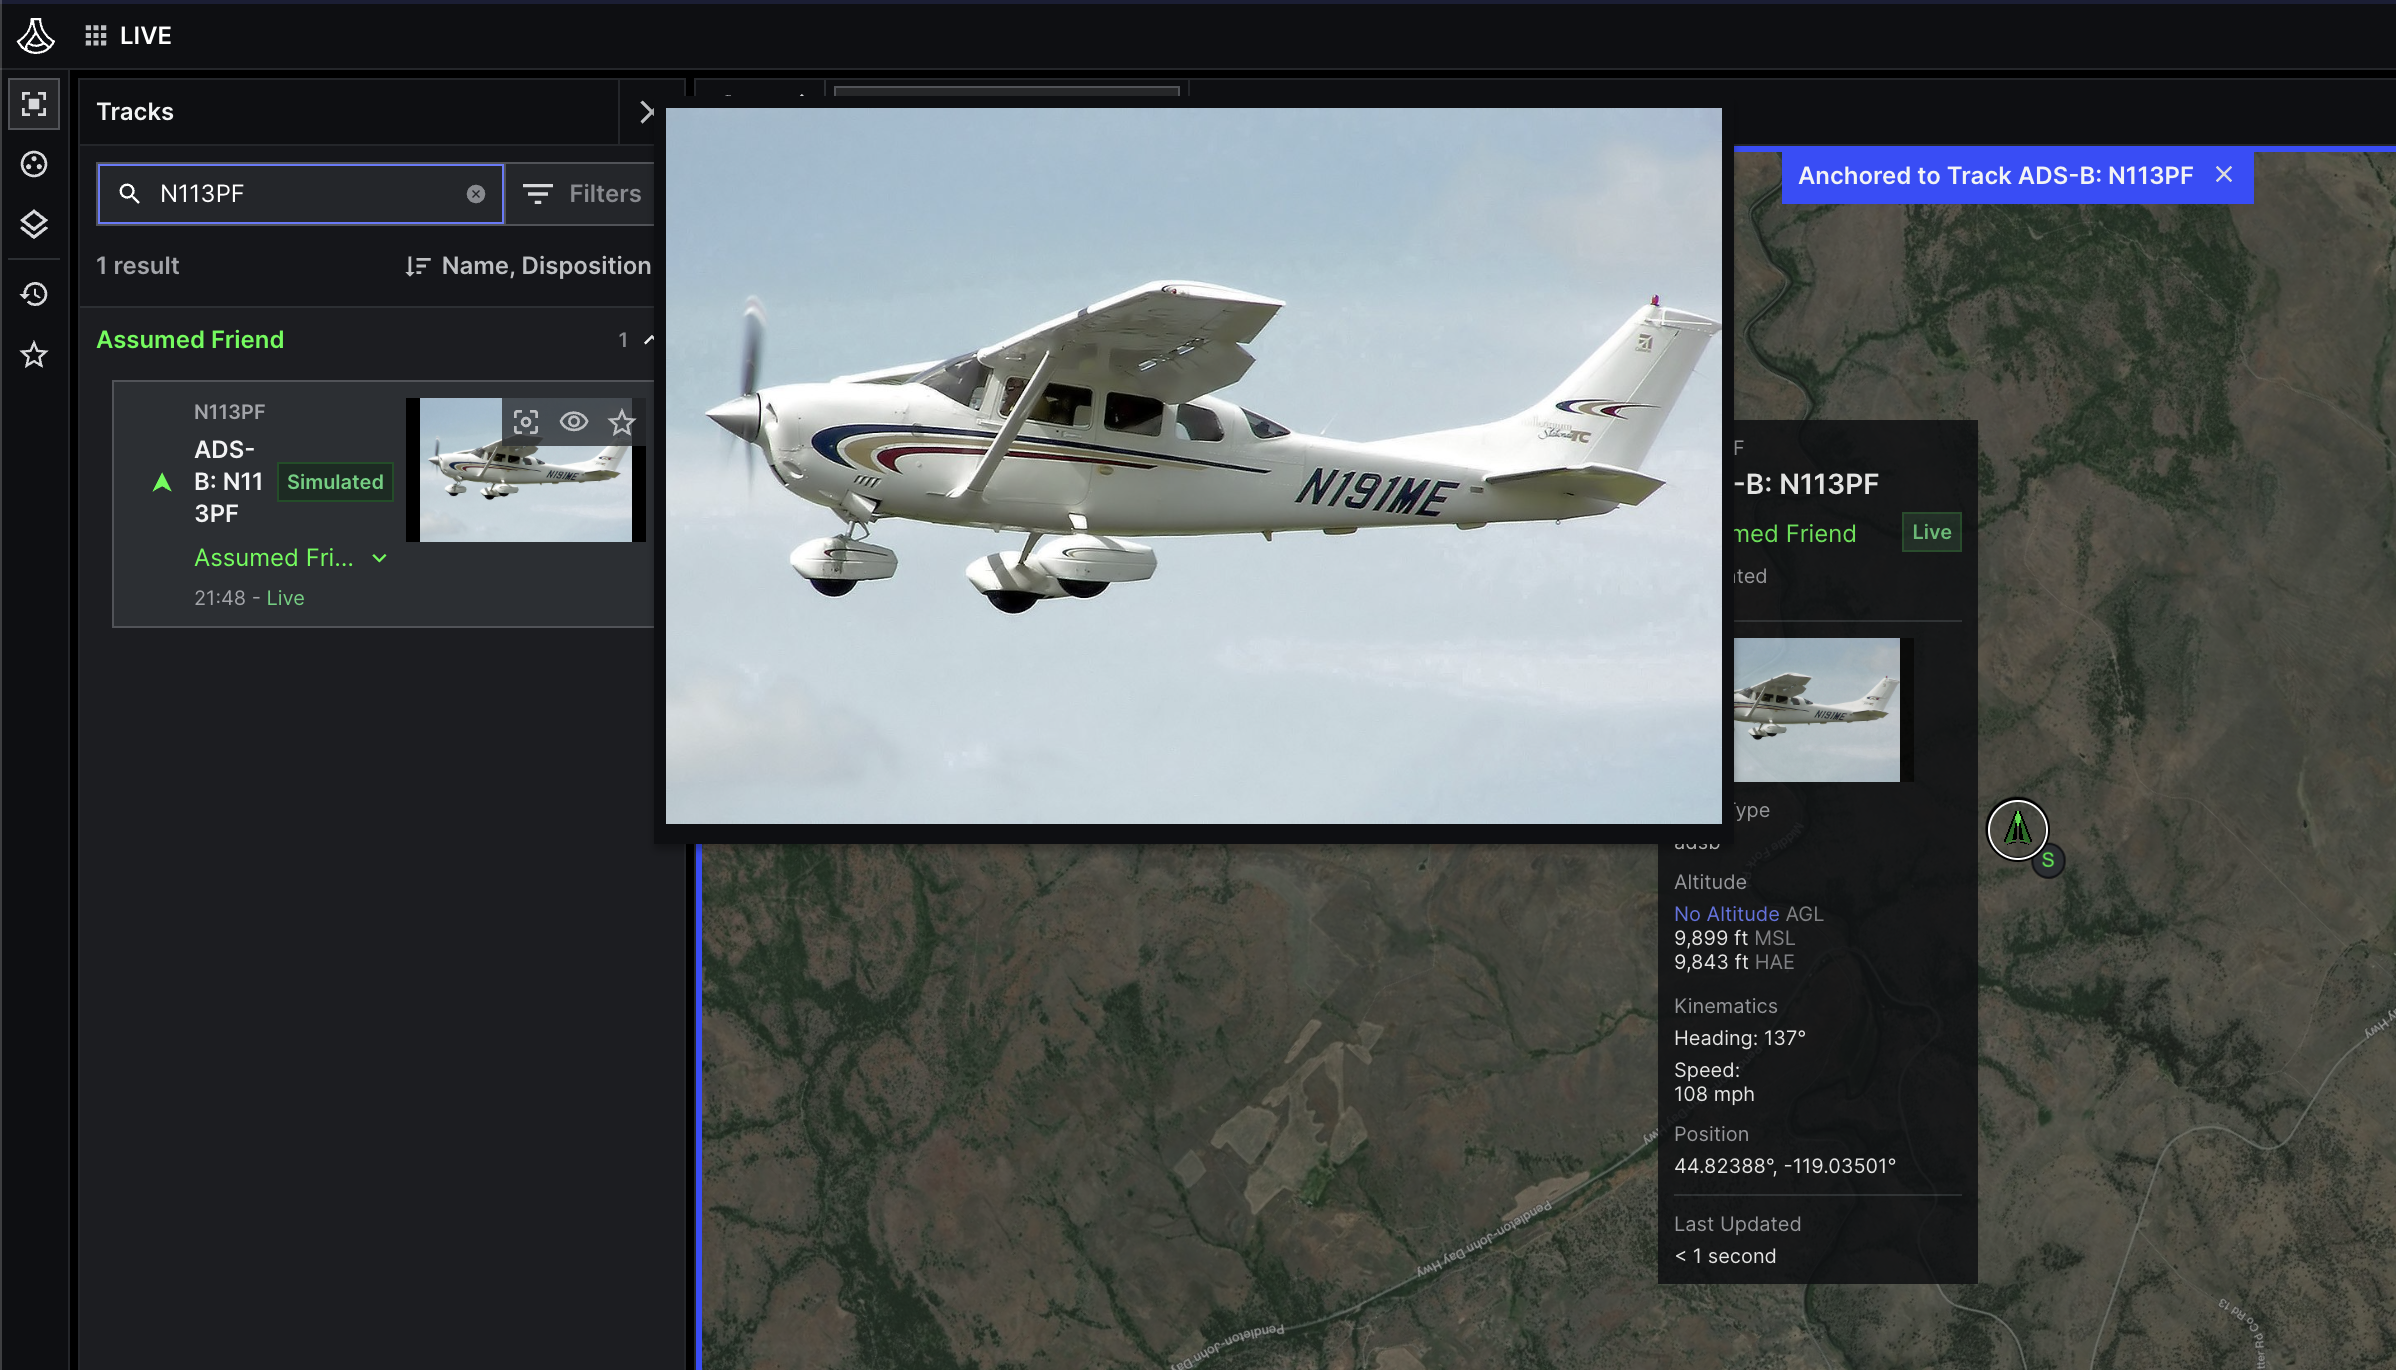
Check the thumbnail
To see the track thumbnail, open the example C2 app, and do the following:
Link multiple objects
In some cases, you might associate more than one object with an entity. An airplane, for instance, might link to an image to display a thumbnail, and a CSV that contains additional metadata, such as the airplane’s flight manifest.
To do this, get the existing media linked with the entity, then override the entity’s media component
to append a new MediaItem to the list:
Upload the file
Run the following code from the same folder where you saved manifest.csv.
To upload, use UploadObject and replace the following:
file_path: The path to the file you want to upload to Lattice, in this case,./manifest.csv
Override the entity
Use OverrideEntity to modify the entity’s
media component and append a new MediaItem.
This MediaItem references manifest.csv.
To run the code, replace the following:
object_path: The unique path of the object in Lattice. For this example, use/api/v1/objects/manifest.csv.entity_id: The ID of the entity you want to associate with the object.
What’s next?
- Learn how to fetch and process objects from Lattice.
- Learn more about the Object API in the Lattice API Reference.